This post is a little different from my usual photography content. After years of battling an ageing HP workstation that wheezed under the weight of my projects, I finally decided it was time for an upgrade. Instead of taking the easy route and buying a pre-built system, I jumped headfirst into the challenge of building my own PC – for the first time ever.
Building a PC isn’t just about slotting parts together; it’s about crafting a machine that fits your needs. I wanted something that could power through 4K video footage, handle massive RAW photo files, and breeze through video edits without breaking a sweat. I knew this would be a technical challenge, but what I didn’t expect was how much I’d enjoy the process.
From picking the right components to the nerve-wracking moment of pressing the power button for the first time, this build became more than just a means to an end. it was about the experience of assembling it, troubleshooting, and learning along the way.
“Is it hard?’
Robert M. Pirsig, Zen and the Art of Motorcycle Maintenance: An Inquiry into Values
Not if you have the right attitudes. Its having the right attitudes that’s hard.”
Why Build a PC?
I could have bought a prebuilt system, but where’s the fun in that? Building my own PC meant I could select every part to match my workflow, much like choosing the perfect camera gear. It also gave me a deeper understanding of my new machine. Plus, there’s something very satisfying about knowing you built it yourself.
My first task was to set a budget, which did shift upwards as I researched my options, but at least it served as a rough guide. Then it was deciding what I wanted the PC to do – my ‘use case’. For me, it’s primarily for photo and video editing, and this determined which components would be most suitable. On top of that, I had to make sure the components are ‘balanced’ so everything works together nicely, without any one component being too demanding on others.
Choosing the Parts – A Creative Process
Every component has a role. Let me walk you through the main components of a standard PC and explain why I chose each one. Don’t worry if you’re a technophobe – I will explain the purpose of each part in non-technical terms.
PC Case
Think of the PC case as a house for all your computer’s parts. It keeps everything – like the processor, graphics card, and storage – safely in one place, protected from dust, damage, and overheating.
Just like a house has windows, doors, and vents for airflow, the case has fans and vents to keep things cool so your PC doesn’t overheat when working hard. It also helps organise cables and connections, making everything neat and easy to access when you need to upgrade or fix something.
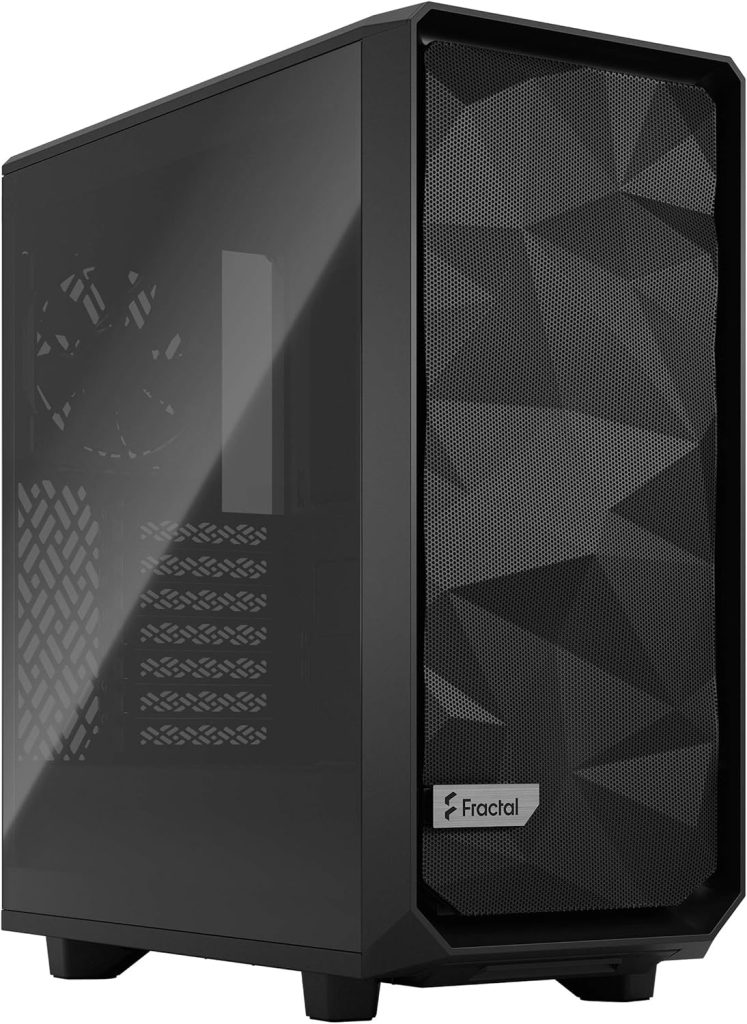
Cases come in different sizes. You’ve got your massive full towers (the mansions of the PC case world), your much more compact mini towers, and then there’s the Mid Tower, which is the Goldilocks sweet spot. I went with the Meshify 2 Compact. Not too big, not too small, just right for sitting at the end of my desk. It also looks good too, with a lightly tinted glass side panel that lets you gawk at the PC’s innards.
CPU (Central Processing Unit)
The CPU, or processor, is like the brain of the computer, it handles everything. The faster and more powerful the CPU, the better the computer is at multitasking and running demanding programs. Think of it like a chef in a kitchen – taking orders, preparing food, and making sure everything runs smoothly. The better the chef (CPU), the faster and more efficiently meals (tasks) get done!
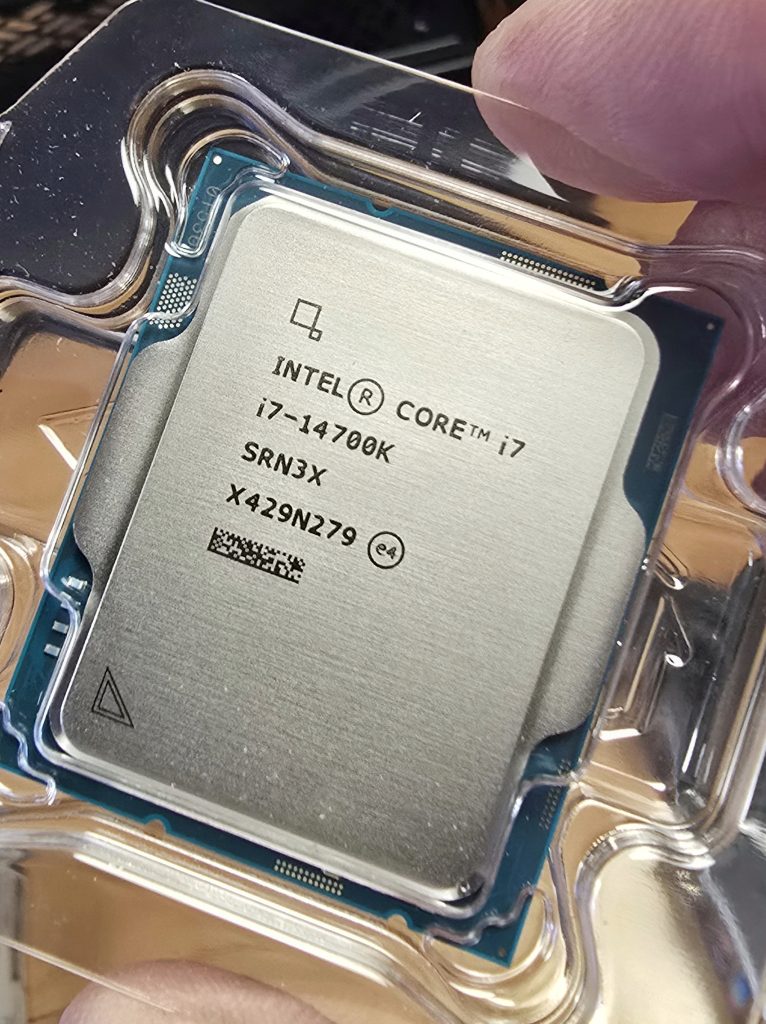
The CPU I chose is the Intel Core i7-14700K, which provides plenty of power at a reasonable price. It does run hot, so I had to make sure sufficient cooling was available, but more on that later.
The Motherboard
The motherboard is, as it’s name suggests, a board containing electronics that act as the central hub or backbone of the computer. It connects all the important parts—like the brain (CPU), memory (RAM), storage, and graphics card so they can work together. Think of it like a city with roads. The motherboard is the city’s infrastructure, making sure information can travel between different parts smoothly.
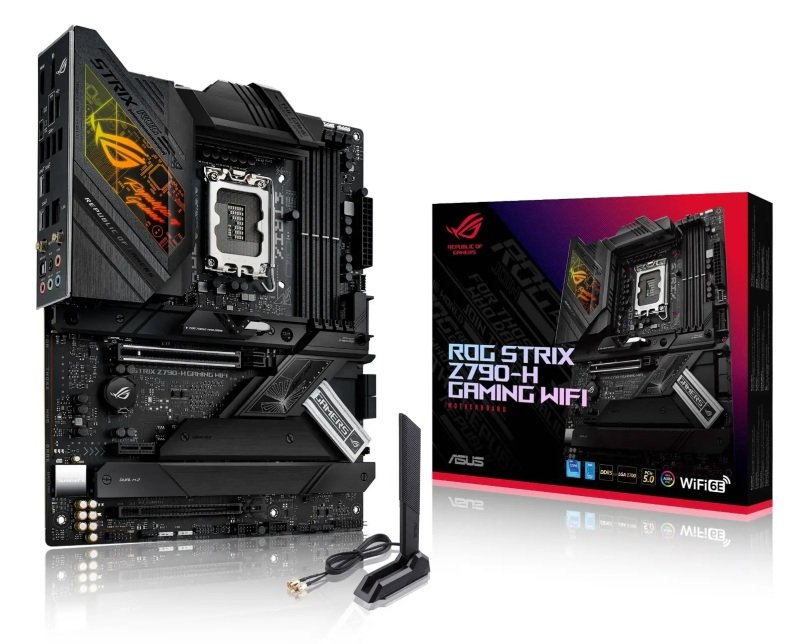
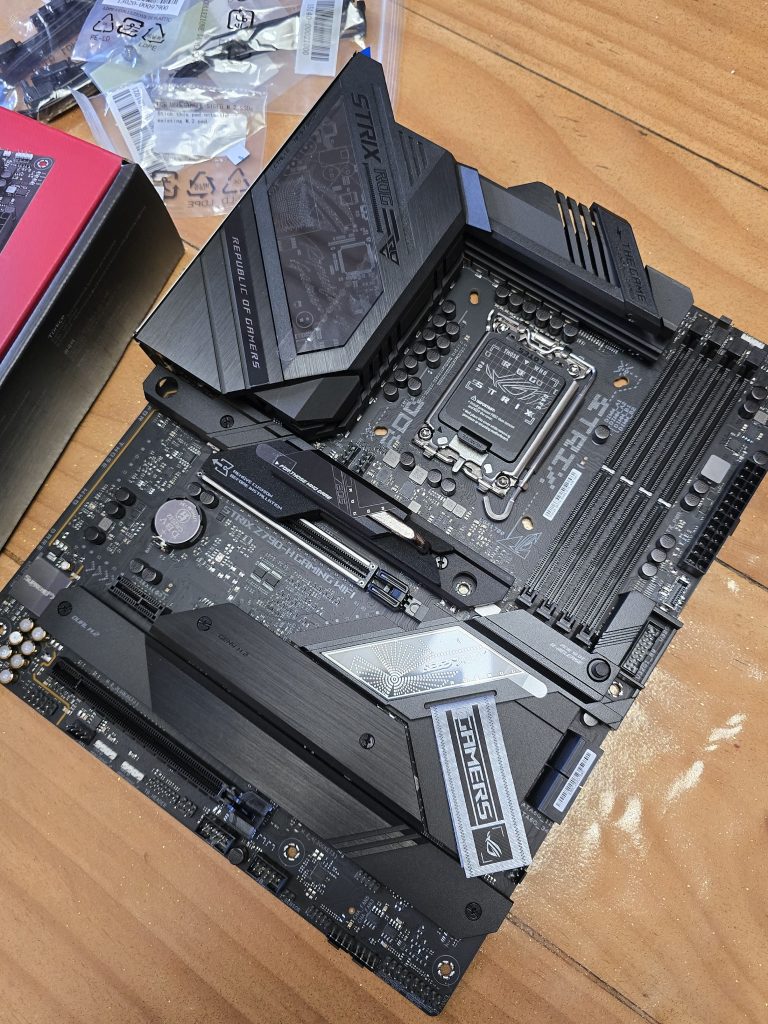
It also provides power to different components and has slots for adding extra features, like more memory or better graphics. Some motherboards even have built-in Wi-Fi and sound systems. I chose the Asus Z790-H because experts highly regard it, it fits perfectly in my case, and it comes with built-in Wi-Fi (hence the little aerial you see in the photo!).
RAM (Random Access Memory)
RAM is like the short-term memory of your computer. Imagine you’re working on a desk. The desk is your RAM, and the papers on it are the programs or tasks you’re actively using. The bigger the desk (more RAM), the more things you can keep out and work on at once without getting cluttered or slow. Once you turn off your computer, anything in RAM is erased, just like clearing your desk at the end of the day.
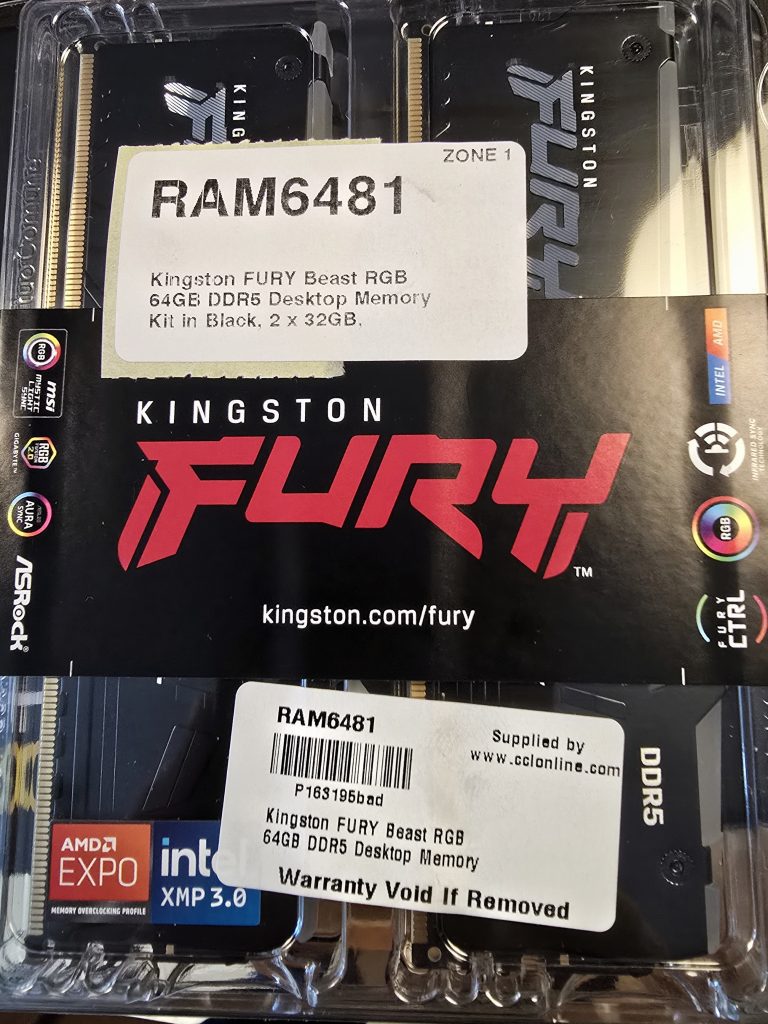
I decided to opt for Kingston Fury Beast DDR5 RAM, which can run ‘overclocked’ on my chosen motherboard (which just means it’s capable of running at a higher speed). I also wanted RAM with lights (‘RGB’ as it’s called) for a bit of bling – this is purely visual and has no impact on performance!
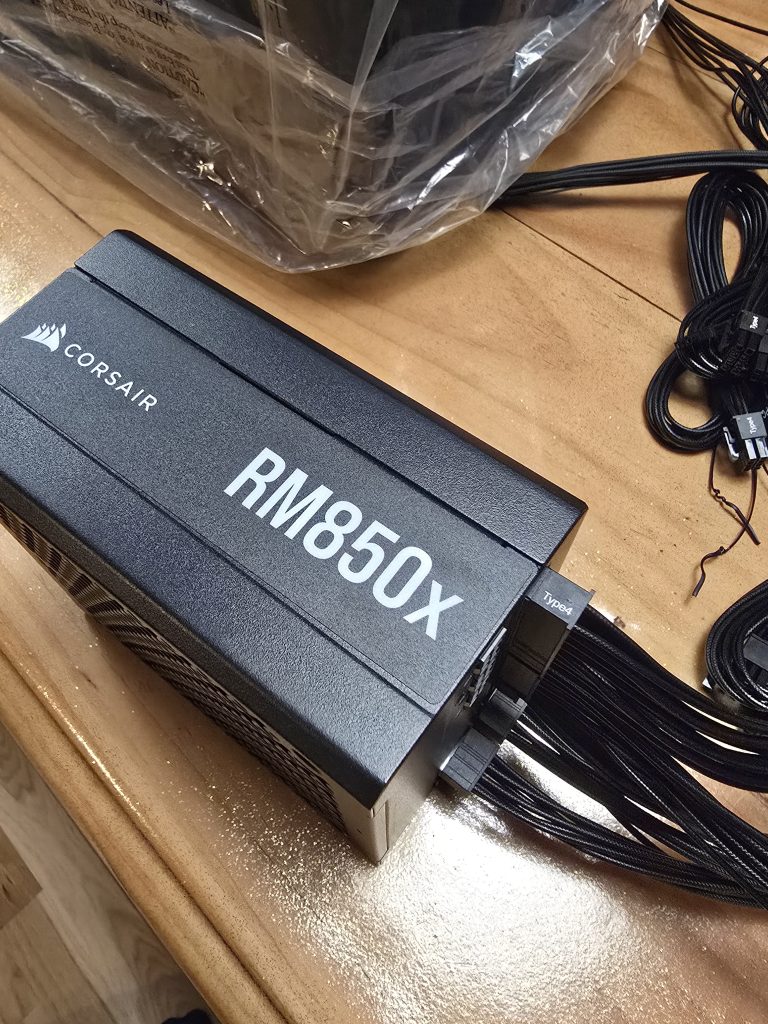
Power Supply Unit (PSU) – The Unsung Hero
The power supply takes the electricity from your wall socket and provides consistent power to the CPU, RAM, hard drives, and all the other components so they can do their job.
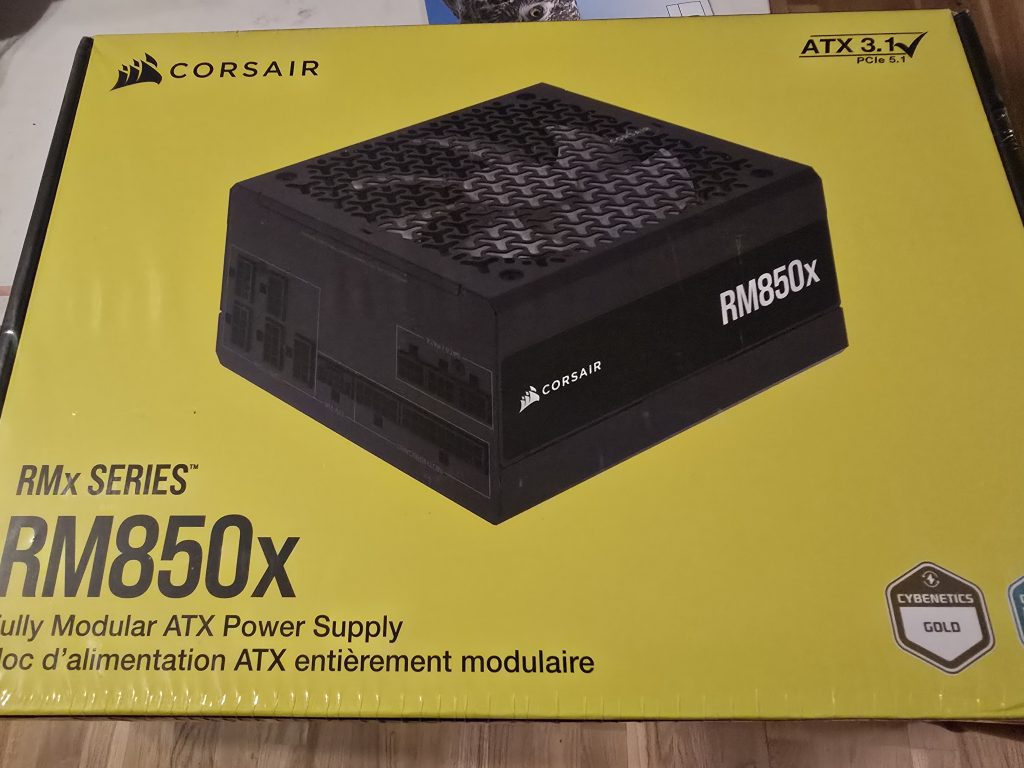
It’s important to get the right size (wattage) for your purposes – I calculated that 850 Watts would be more than enough to power my components, so I chose the Corsair RM850x as a well-reviewed PSU at the right price point.
GPU (Graphics Processing Unit) – The Power Behind Visuals
Think of the GPU as a painter who is in charge of creating and displaying all the images, videos, and graphics you see on your screen. It’s especially important for things like detailed graphics in video editing, where lots of images need to be processed quickly.
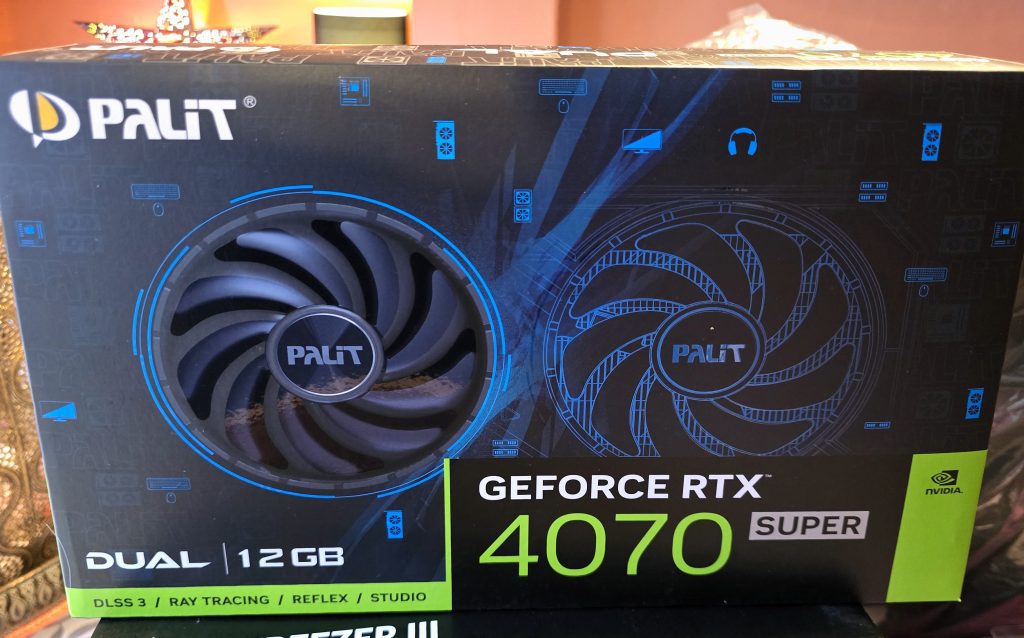
The more powerful the GPU, the better it is at handling high-quality images and video. The GPU I went for is considered a good mid-range card for video work, containing 12GB of so-called VRAM (Video RAM) – 8GB is considered the minimum. It’s also a pretty big beast compared to cards I’ve used in the past, it even has two built-in fans just to keep itself cool!
The Cooling System – Keeping Everything Cool
The CPU cooler is like a fan or air conditioner for your computer’s CPU. The CPU gets hot when it works hard, and if it gets too hot, it could slow down or get damaged. The cooler helps keep it at the right temperature by drawing heat away and releasing it into the air.
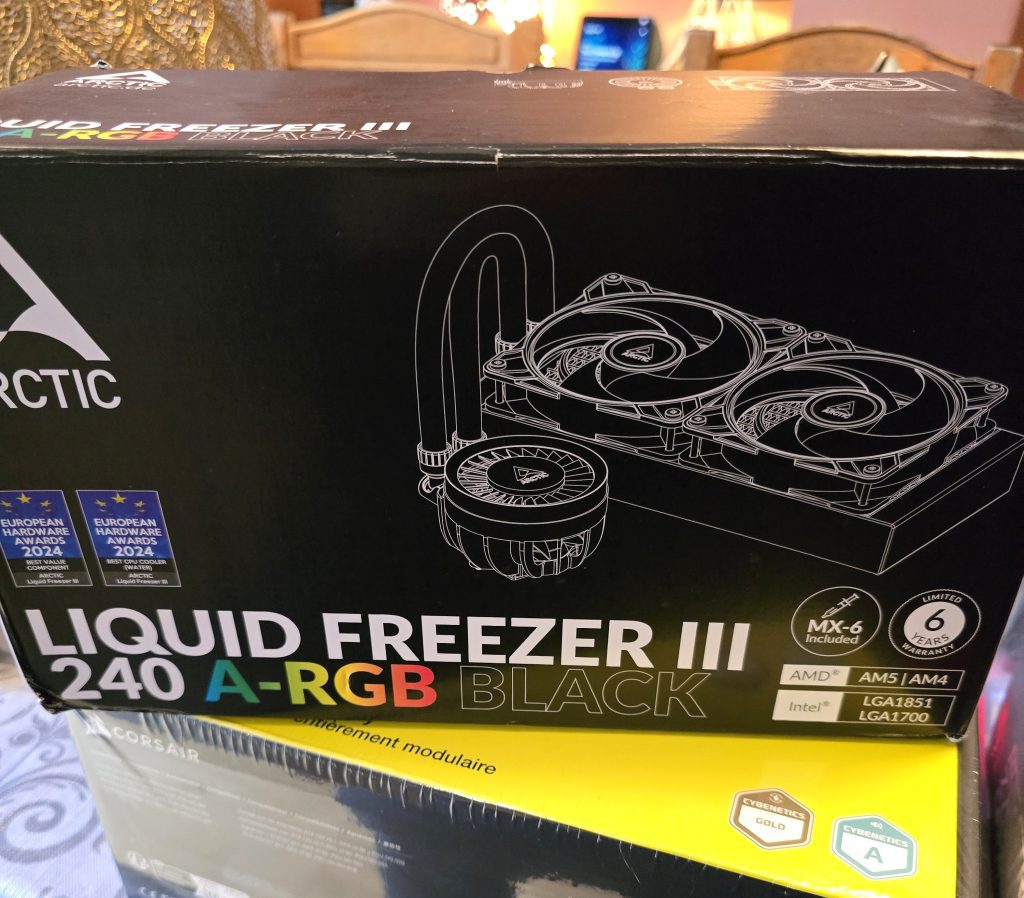
There are two main ways of of cooling the CPU: fan cooling and water cooling. The former is the most common type, but I opted for a water-cooled system, choosing the Arctic Liquid Freezer III, again with the added option of RGB ‘bling’!
Storage – Fast Access vs. Long-Term Backup
Storage is where your computer keeps all your files, programs, and data, like documents, photos, music, and apps. It’s like a library where everything is saved, but you can access it whenever you need it.
There are different types of storage, each with its own strengths.
- HDD (Hard Disk Drive) – This is like an old-fashioned filing cabinet, and contains physical spinning disks. It stores data by writing it on these disks. HDDs are cheaper and can store a lot of data, but they’re slower than newer storage types. I will be using two of these HDDs for long-term storage.
- SSD (Solid State Drive) – Think of an SSD as a digital filing cabinet with no moving parts. It stores data on chips, making it faster and more reliable than an HDD. There are two types:
- SATA SSD – A bit older and slower than newer SSDs, but still much faster than an HDD. I will be using one of these, taken from my existing PC.
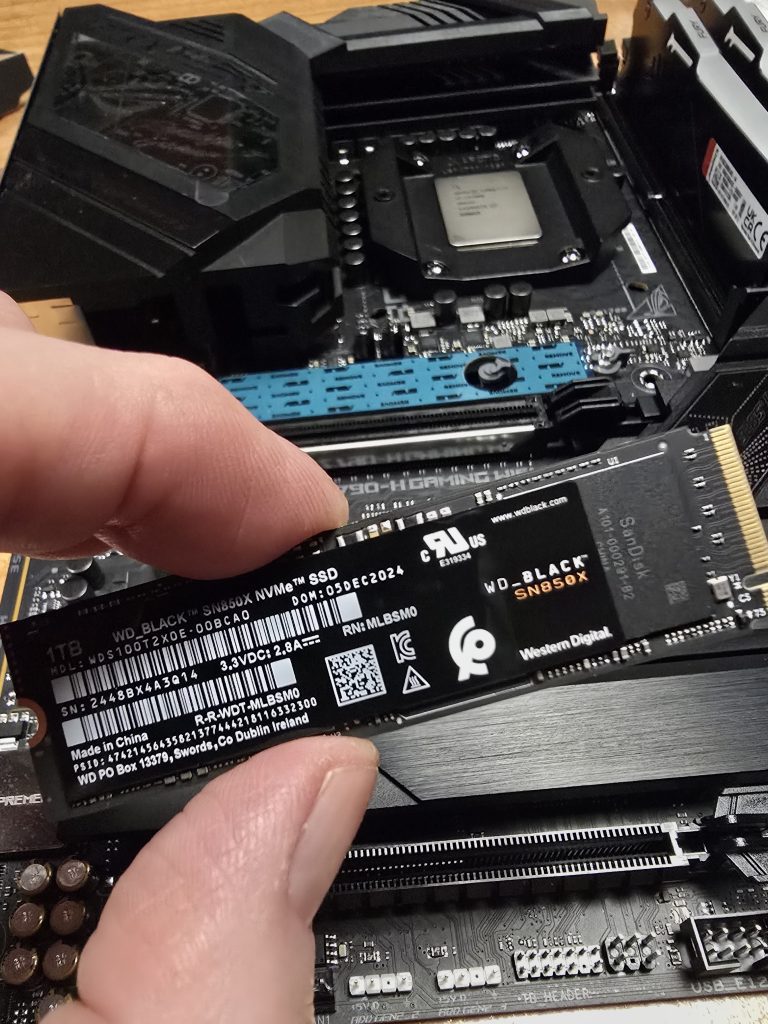
- M.2 (or NVMe) SSD (pictured above) – The fastest type of SSD, it connects directly to the motherboard and is much quicker than SATA SSDs, making it great for tasks like video editing. I will be using two of these, one containing the computer’s Operating System and programmes like Adobe Lightroom. The other will contain video cache files and active project files.
The Build Experience – More Than Just Assembly
With all the parts purchased it was time to start putting them together. Before I started I made up a checklist (I know, it’s tedious, but trust me you have to be organised when you’re doing this!):
A Table Fit for a (Tech) Feast. Find a clean and clutter-free surface to work on, a strong table that’s big enough to lay all your components on. I used my kitchen table, where everything I needed was in easy reach. I also used some shallow bowls for storing screws and bolts from the various components, they’re very easy to lose or get mixed up. These also attracted the cats, thinking I’d laid out food for them, because everything I do is for their benefit of course. Have your manuals set aside too.
Tools of the Trade (and Not Many). All you really need is a couple of star head screwdrivers, one small and one slightly bigger. That’s it! Oh, and maybe a pair of snips for cutting cable ties. You can invest in a ground strap to make sure you don’t discharge static to a component, or, you can do what I did and discharge static electricity simply by touching a bare metal part of the computer case; this effectively grounds you and releases any built-up static charge.
Let There Be (More) Light! With hindsight I would have wanted better lighting, and possibly even a head torch so I could see adequately. Even in daylight the insides of a computer case can have dark recesses. My phone’s torch function was adequate but an adjustable and bright light source would have been better. Don’t underestimate how much light you will need.
The Time Sink Effect. So you want to complete this is one hour? Two? Get real. Be prepared for some detours, throwing manuals across the room, and moments of existential doubt. I set aside a whole weekend and just relaxed into it. Treat it as an exercise in attention to detail and mindfulness.
Next up: the build! I’ve broken down each stage with photos taken with my mobile phone to guide you through the chaos. But don’t get too excited—I’m not doing a step-by-step how-to here. There are plenty of YouTube tutorials and experts for that. At the end of this post, I’ll link to some of them. So, let’s get started…
Preparing the Case
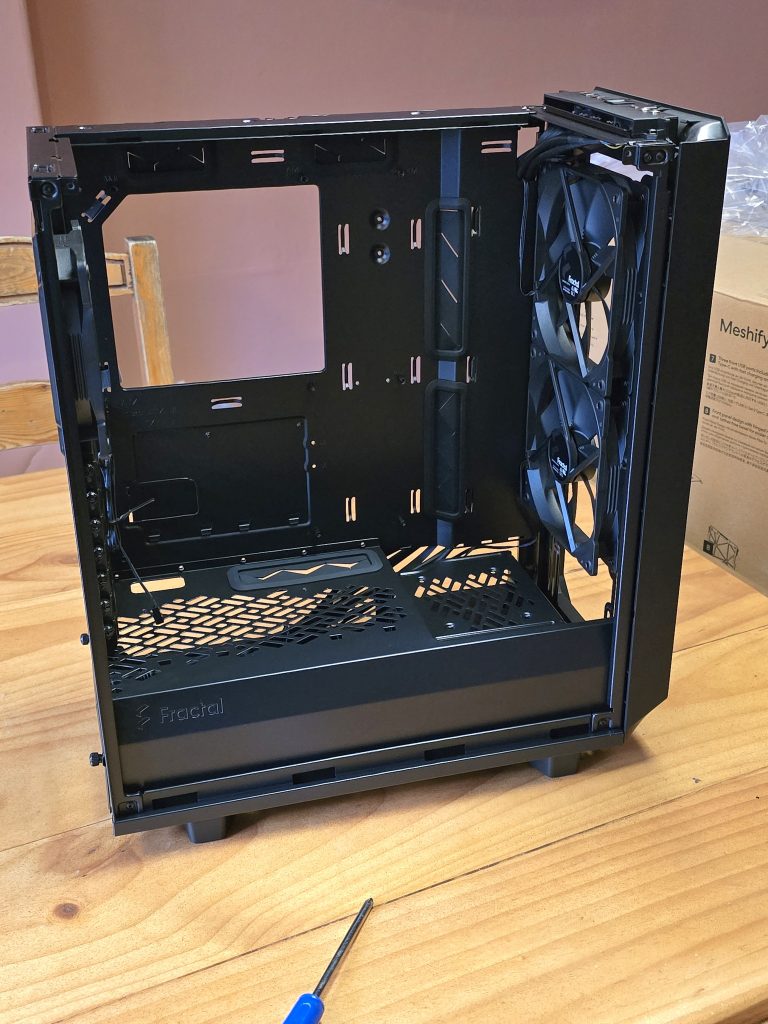
The first step is preparing the case, which means unpacking it, and removing anything that will get in your way during the build. That includes the side panels, the top panel, hinged front door panel, and the mesh filters. Be sure to store carefully any screws you remove during this stage.
CPU Installation
The next few steps involve installing as much as possible onto the motherboard before it’s screwed into the case, so that you have more room to work.
First, install the CPU. This was a little nerve-racking because I wanted to be 100% sure I installed the CPU the correct way round on the motherboard. Fortunately, the CPU and motherboard manufacturers make this straightforward by providing a small triangle/arrow indicating the correct orientation of the CPU. They are kind and good people.

Note in the photo above the arrow in one corner indicating where it should align with the motherboard. Next, I installed the cooler backplate, which is a metal heatsink designed to attach the water block of the cooler onto the CPU.
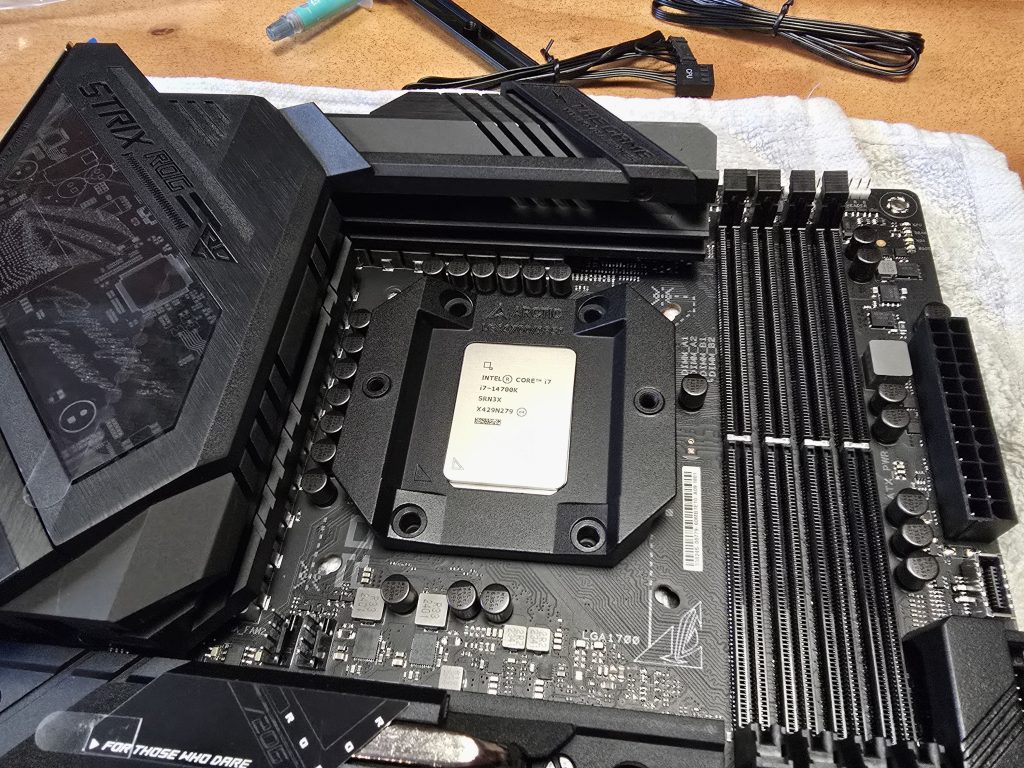
This involved unscrewing and removing the metal clamps pre-installed on the motherboard and then installing the backplate as shown above – easy to do with Arctic’s clear instructions and the pre-supplied bolts.
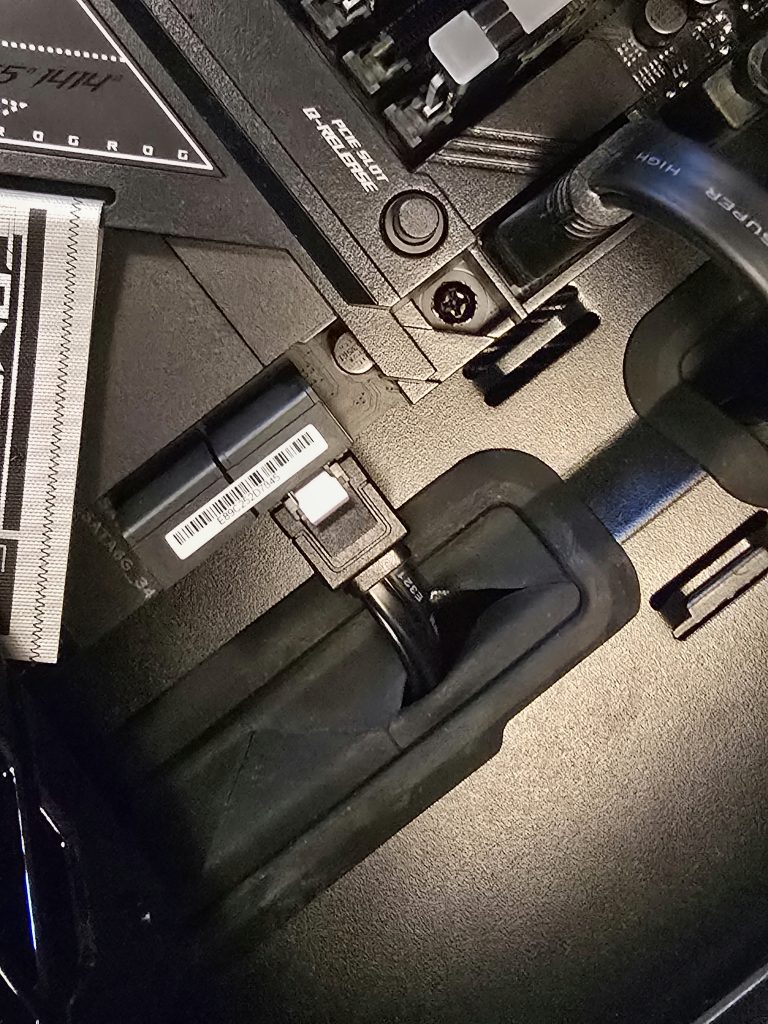
NVMe SSD Installation
Installing both my NVMe drives onto the motherboard was much easier than installing the old spinning disks I’ve used in the past!
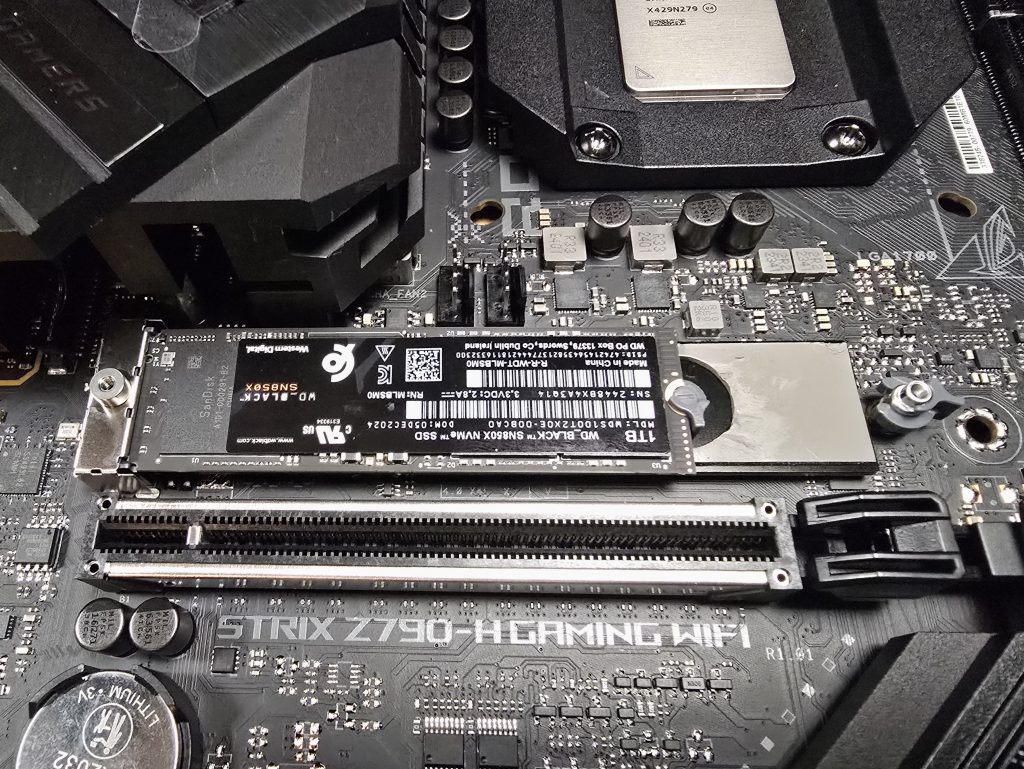
I loved that it was so easy to install – you insert the drive into the motherboard connector at one end, then slide the lock over at the other end to secure it in place! A heatsink is placed over both the drives to ensure they operate at optimal temperature.
RAM Installation
Installing the RAM (memory) was next, again straightforward but I was aware that I was using two modules, and they had to be plugged into specific slots on the motherboard for optimal operation. This information was gleaned from reading the motherboard manual.

Motherboard Installation
I was now ready to attempt installing the motherboard into the case. I had to carefully align holes on the motherboard with holes in the case. There was also a post sticking up from the motherboard that slotted through a hole near the centre of the motherboard to guide it into the correct position.

After that, it was a case of screwing the motherboard down with the supplied screws, making sure not to over-tighten, which could damage the board.
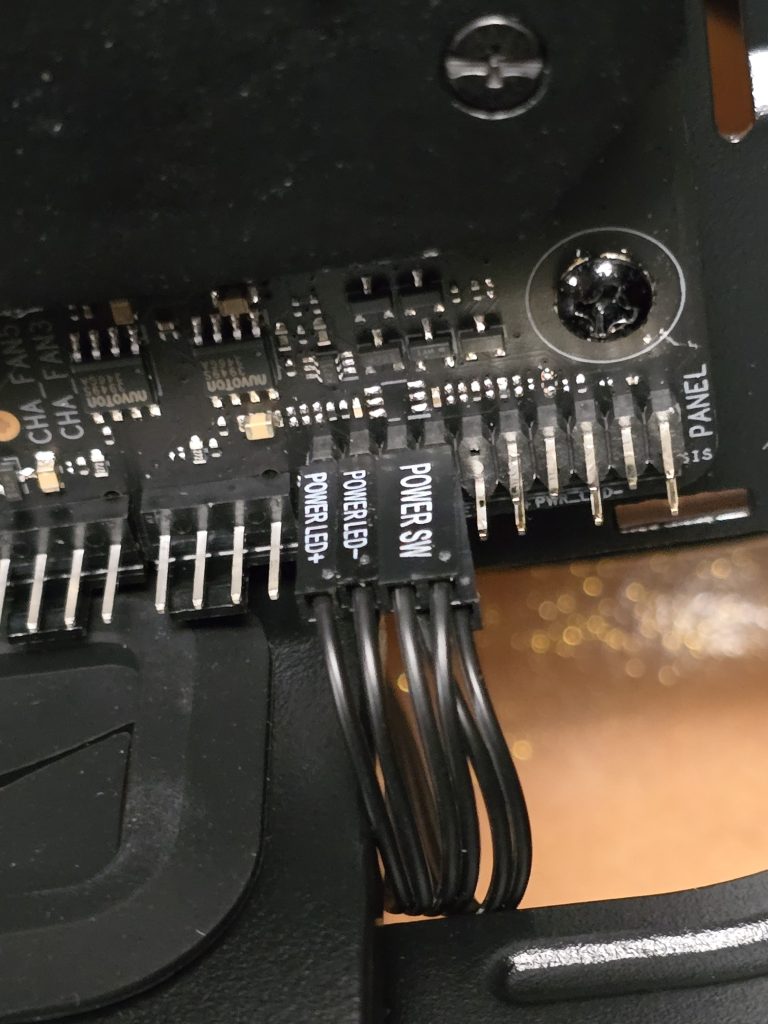
Case Cable Installation
The case has power and reset buttons, and connectors for sound and USB ports that need to be connected to the motherboard so they can be fed power. The cables are pre-installed on the case and have to be routed through the various gaps in the case to where the connectors are on the motherboard.
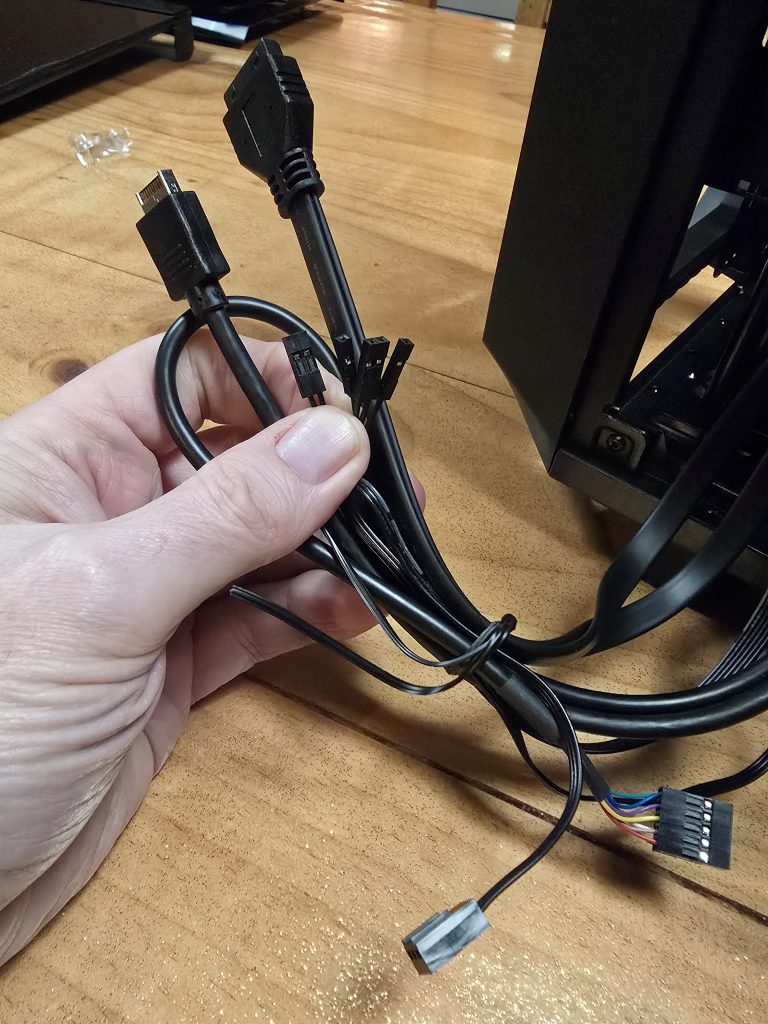
The smaller connectors were particularly fiddly to install, you need good light to make sure they’re connected to the right pins on the motherboard. This is where study of your motherboard layout comes in! It’s also easy to bend pins, so care is required.
Power Supply Installation
Next came the power supply (PSU), which proved to be one of the more tricky tasks given how many cables need to be attached. Thankfully, the supply I chose is modular, meaning I only need to attach the cables I need, and no more.
I then fed through the cables into the case and pushed the PSU into place, screwing it to the rear of the case using the supplied thumbscrews.
SATA HDD and SSD Installation
What does SATA mean? SATA stands for Serial Advanced Technology Attachment but you don’t need to know that – it’s just one way for the computer to connect to storage devices like SSDs. Installing my SATA drives was a little tricky given the space restrictions at the bottom of the case, but with some patience I managed it without too many problems.
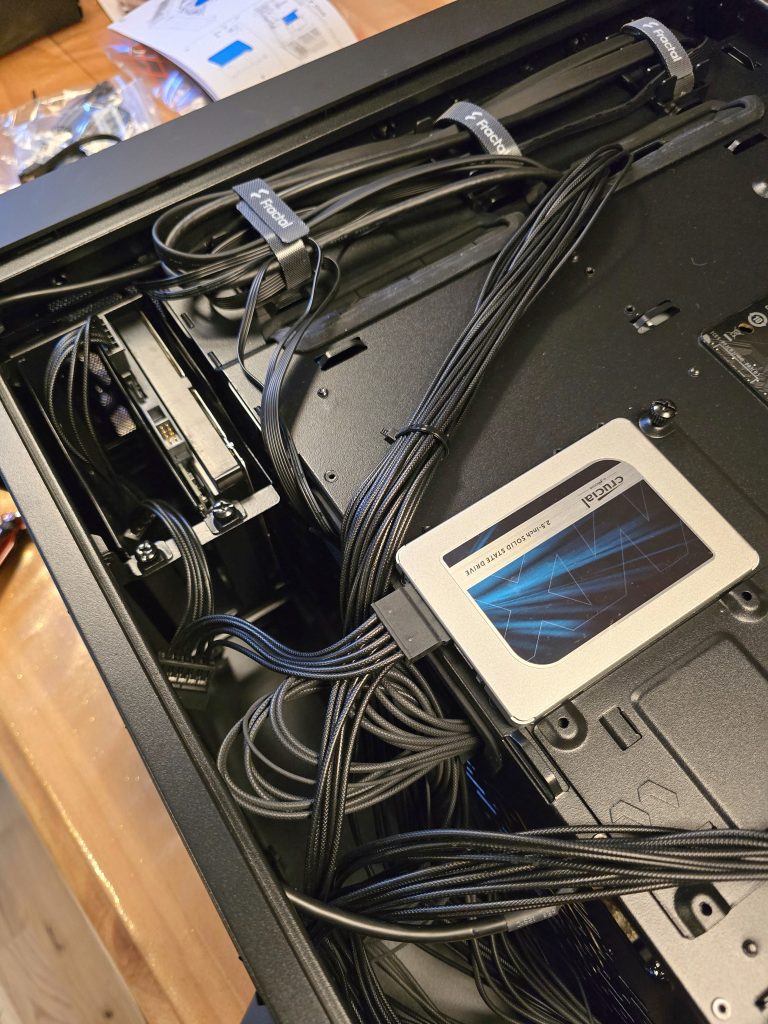
In the photo above you can see the SSD drive attached to the side of the case with it power cable coming from the power supply. The rear of the HDD drive is visible in the top cradle at the top left of the photo.
The down side to SATA drives is that they need cables to deliver power from the power supply directly, plus a data cable connected to the motherboard.
CPU Cooler Installation
Next up was the cooler for the CPU. The Arctic Freezer is a heavy beast, and not exactly small, but thankfully there was enough room to install it at the top of the case.
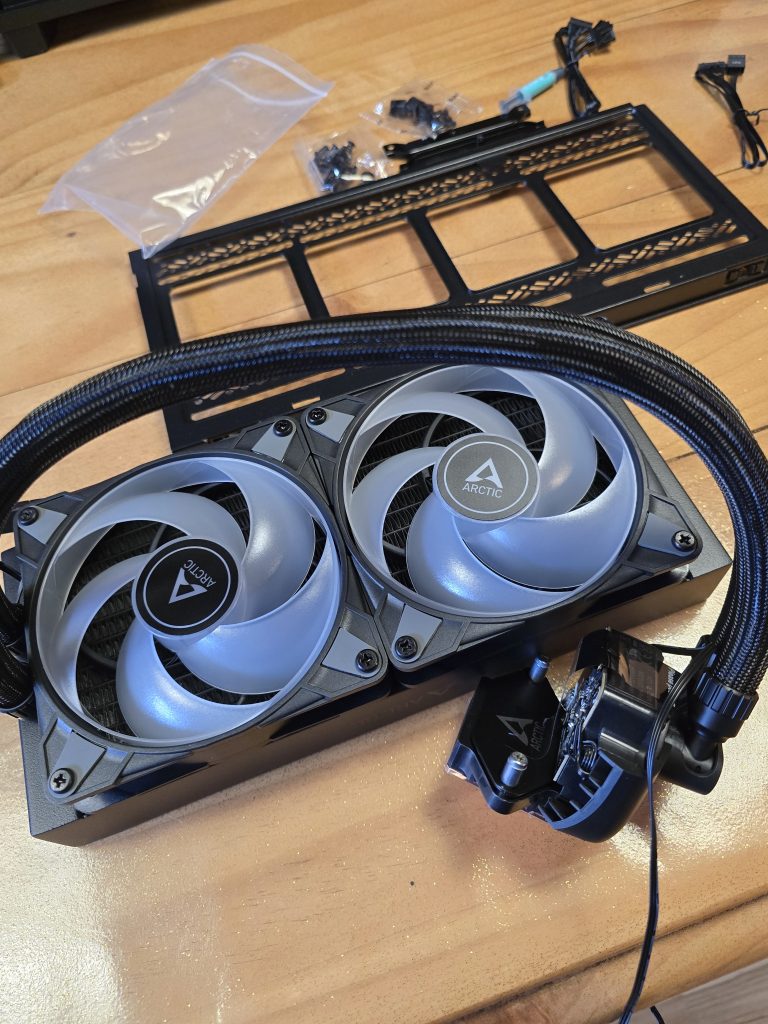
In the photo above, you can clearly see the water block on the left, which will be attached to the top of the CPU. Quick explanation on how it works: heat from the CPU heats up the water, which is then is taken through the tubes to the radiator. This dissipates the heat with help from the fans. A pump pushes the cooled water back round to the water block, forming a continuous loop.
Once I installed the radiator, I then looked at attaching the water block to the cooler backplate. First I had to spread some of the supplied ‘thermal paste’ over the top of the CPU, as shown in the photo below. Not my neatest work but that’s OK, it’s not seen! The purpose of the thermal paste is to ensure optimal heat transfer from the CPU to the cooling system.
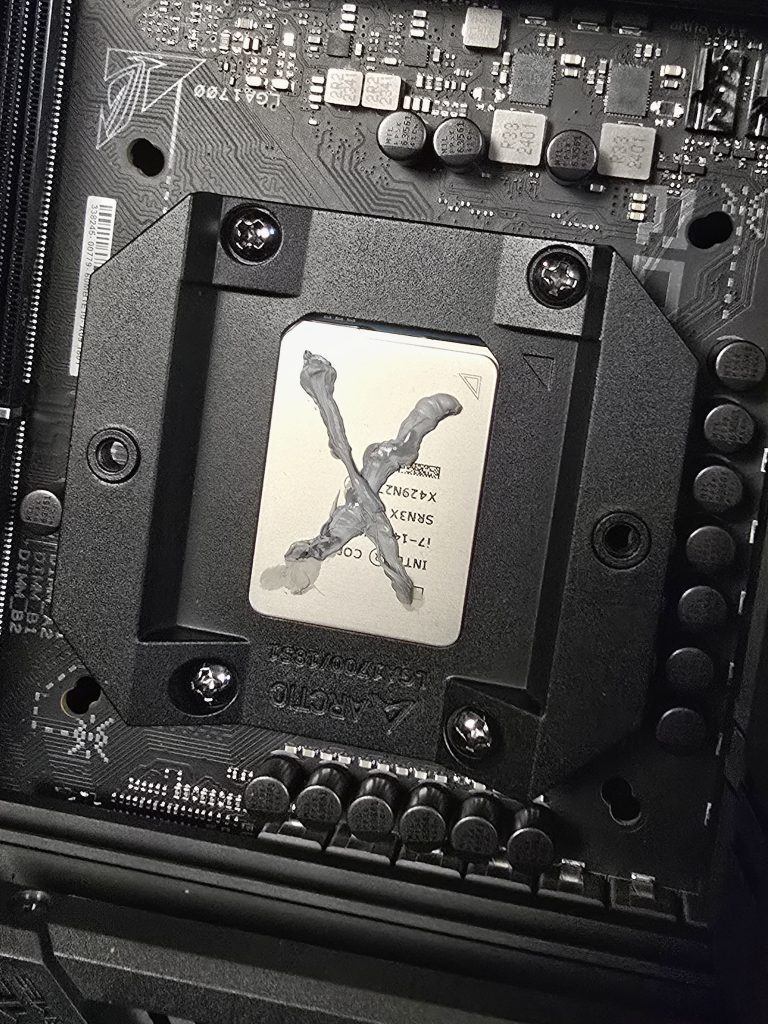
The ‘X’ shape was recommended in the Arctic manual – some coolers use a pea shaped blob of paste placed in the middle of the CPU.
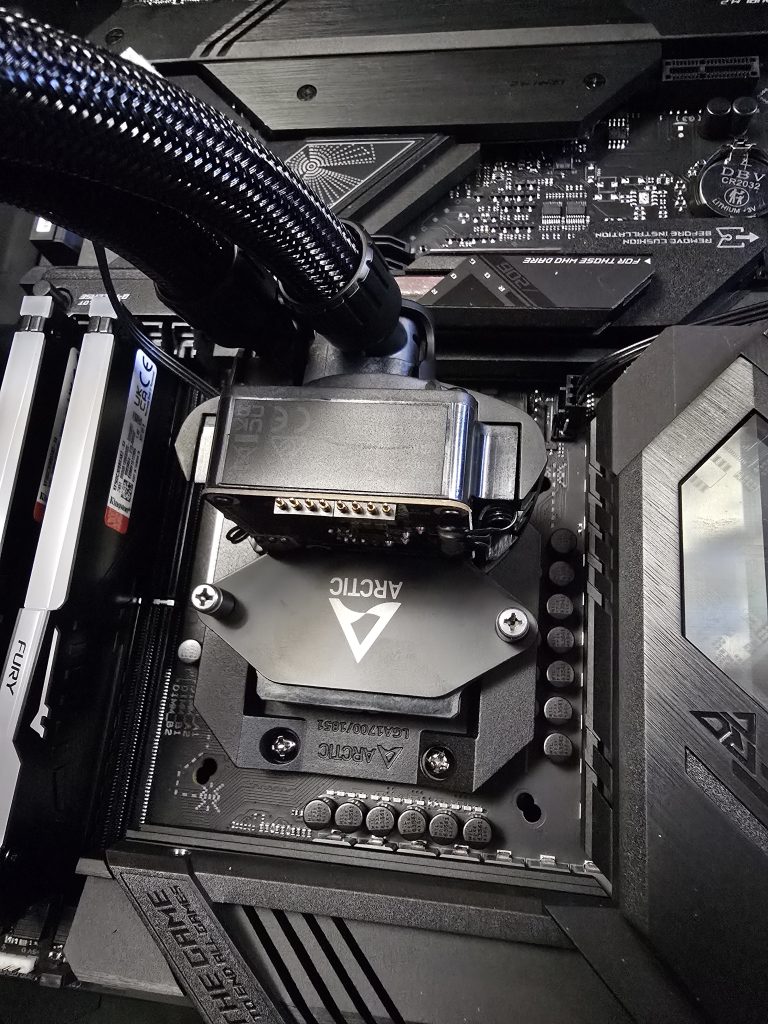
Finally, I bolted the water block onto the backplate as shown above.
Graphics Card Installation
The GPU was next. This was easy to install, requiring the removal of two backplates from the case before slotting it gently into the motherboard’s expansion slot.
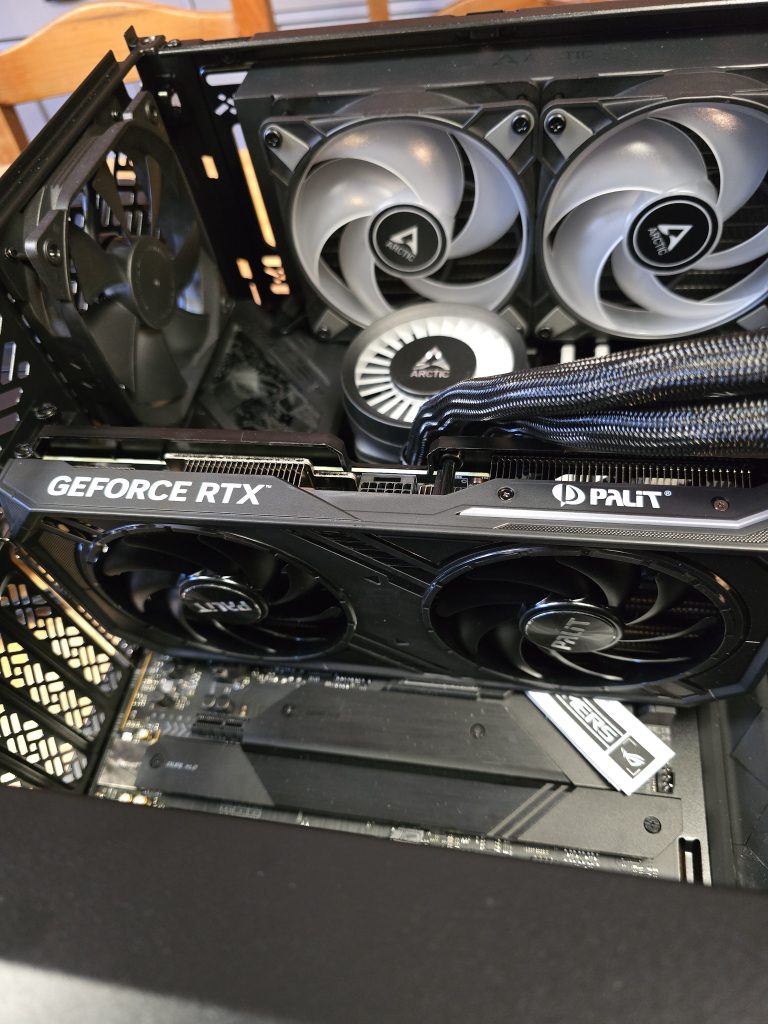
Once the card was in place, I screwed it onto the case then pushed the graphics card power cable through from the back of the case to connect to the card. I wanted to keep the cable as neat as possible, because it’s visible through the glass side panel. Some cable ‘combs’ helped keep everything tidy.
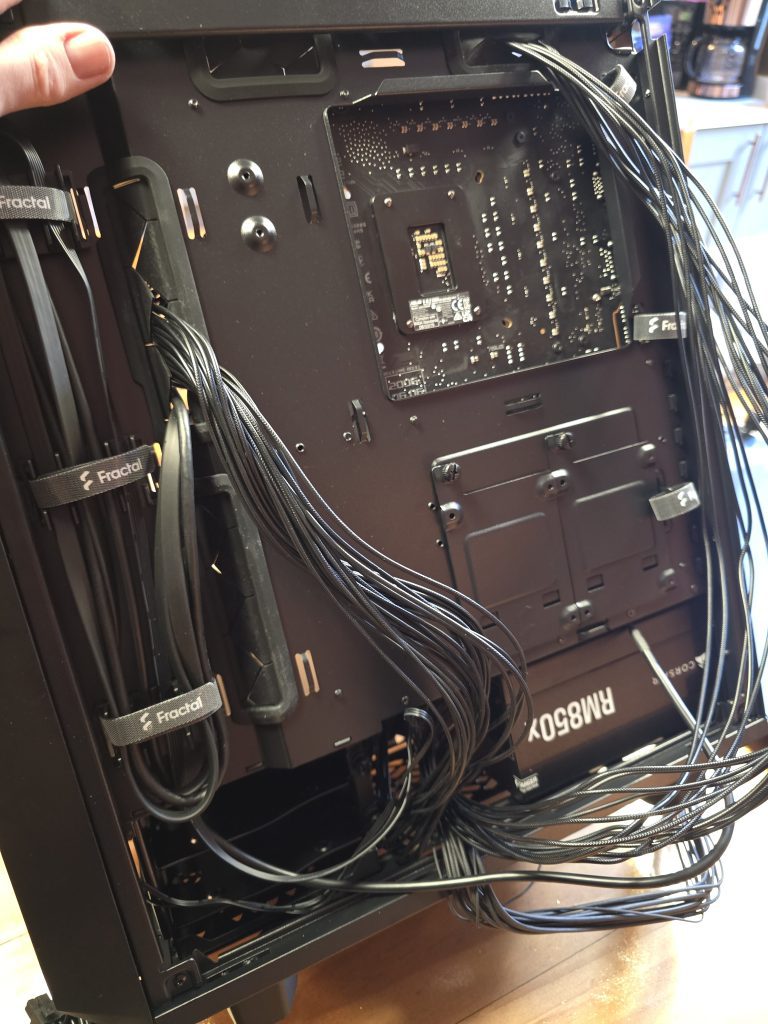
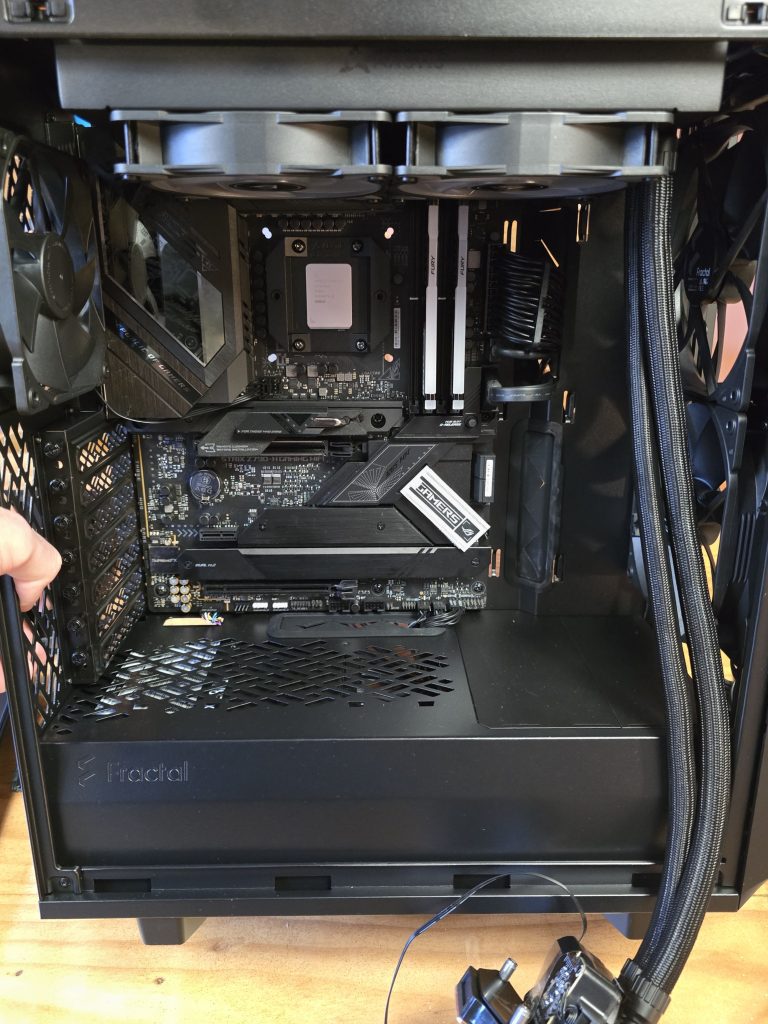
Cable Management
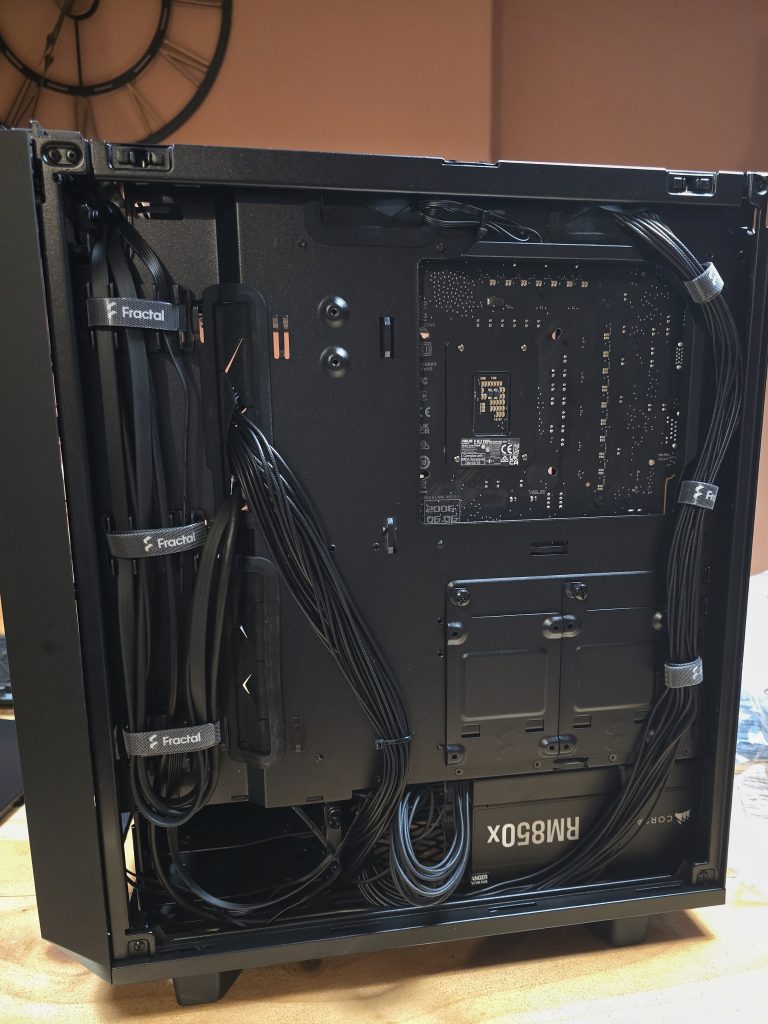
Nearly done! The last step before power-on is cable management. Basically, this is all about making sure all the cables in your PC are secure, and are not damaged. Also, making them neat and tidy creates a more aesthetically pleasing and professional look, even if most of them are hidden behind the case cover. You can see how untidy things were after the power supply was installed!
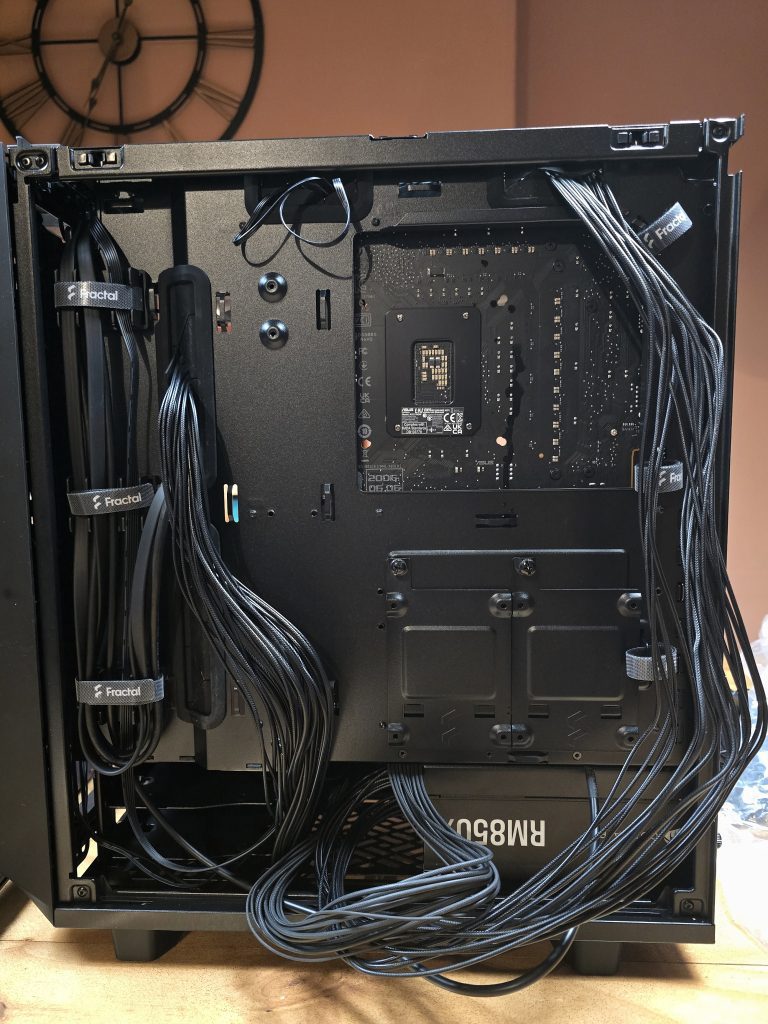
Hopefully you’ll agree that the after photo below shows a much tidier case! If I hadn’t been installing HDD drives at the bottom left of the case, there would have been a lot more room for the power supply cables.
The First Switch-On!
So after replacing the case covers, came ‘The Moment of Truth’! Weeks of research, sourcing components from suppliers, and two days of building, and I wondered what would happen when I plugged it in and pressed the power switch.
Thankfully, everything worked: the lights came on, the fans were spinning, and there were no bright flashes followed by smoke!
The excessive fan noise you can hear in the video wasn’t from the case fans, as I initially thought. It turned out to be the power supply fan, which has a manual override/adjustment switch. Once that was switched off, things got a lot quieter!
Installing Windows 11
My next task was to install the Operating System (Windows 11) on the first SSD drive. After downloading the installation files from Microsoft onto a USB drive I went through the install process, followed by multiple updates and re-boots until it settled down and I was fully up to date.
I couldn’t believe how quickly the thing booted up to the Windows screen: a fraction of the time it took on my old PC.
The Final Steps…
The final few steps aren’t described in detail here, but I include them for completeness:
Making sure all the drives are initialised and showing up in Windows
Installing the latest motherboard and graphics card drivers
Updating the BIOS to the latest version
Adjusting RAM Speed
Adjusting Fan Settings
Installing applications e.g. Adobe Lightroom, Photoshop, and Da Vinci Resolve.
Before Windows, There Was BIOS
I mentioned the BIOS above, so just a brief note to explain what it does. The BIOS (Basic Input/Output System) is like a computer’s wake-up routine. When you turn on your computer, the BIOS checks all the essential components, like the keyboard, mouse, and hard drive, to ensure they’re functioning correctly. Once everything is verified, it hands control to the main operating system (Windows in my case) to complete the start-up process.
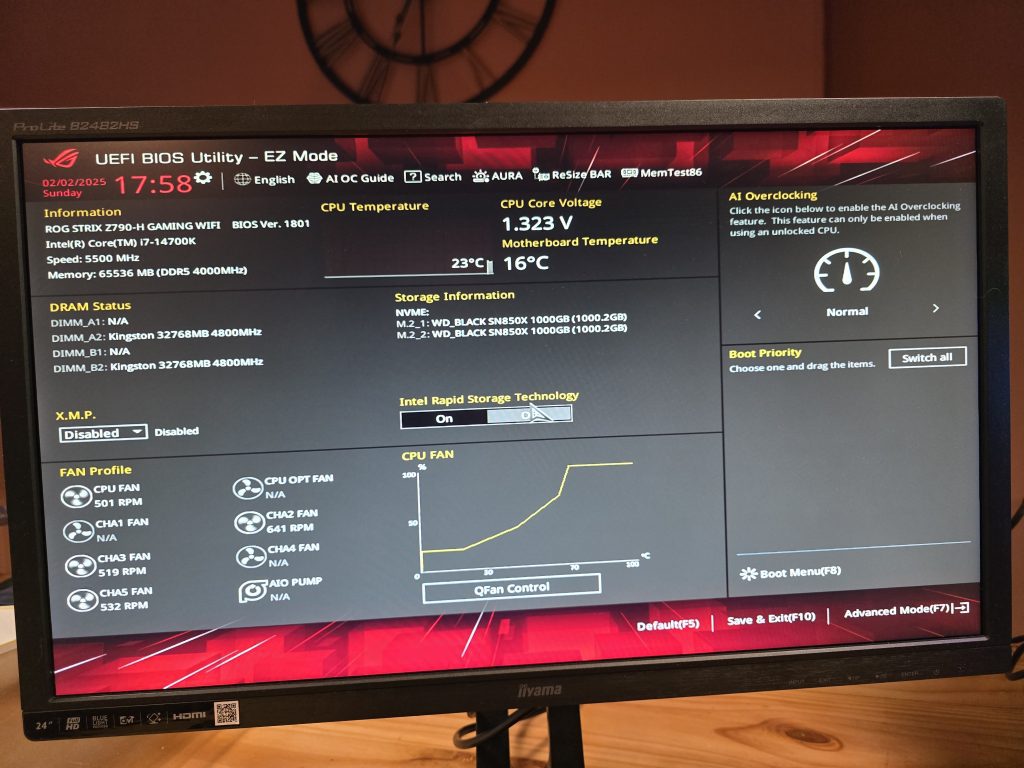
The BIOS utility shown above is fundamental for checking everything is working optimally. The programme provides information about the CPU temperature for example, and how your fans are performing – my fan information is at the bottom left. The X.M.P. setting (can’t remember and don’t care what that stands for!) allows you to run the RAM at higher speed – it’s disabled in the photo but I enabled it, and it’s now running at the optimal speed. The Storage Information in the middle of the screen correctly shows both my NVMe SSD drives for storage.
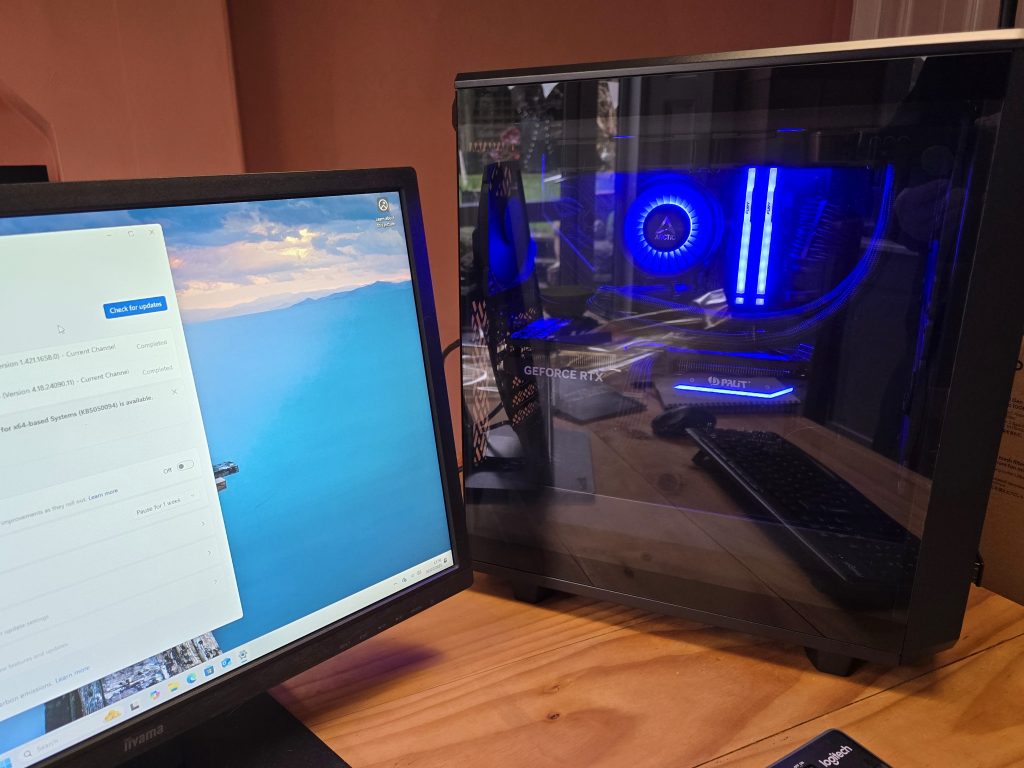
Another change I made was to switch the RGB (lighting) colour scheme. The default is a garish multi-coloured light show that would give an aspirin a sore head, so I opted for something a bit more sedate. I like the blue colour scheme as shown in my video below, and you’ll notice the difference in fan noise after switching off the PSU fan override!
Final Thoughts – Would I Do It Again?
Absolutely. Building my own PC was both a challenge and a rewarding experience. I learned a lot, faced a few hurdles, but in the end, I built a machine that’s perfectly suited to my photo and video work. If you’re considering building your own, I’d say go for it – you might just enjoy the process as much as I did.
I don’t think I’d change my approach drastically. What paid off was doing the groundwork and research before buying components. The successful first boot didn’t happen by accident; it stood more chance of being successful because I’d read through every manual, read comments on Reddit, and watched copious amounts of YouTube videos until I could picture clearly what I needed to do at every stage of the build. I’m a great believer in ‘RTFM’ (Read the F-ing Manual), which is where the fine detail lies. It’s tedious when all you want to do is get your PC built, but it pays dividends during the build.
I also made use of AI, in the shape of ChatGPT, but that’s for another post! Suffice it to say that it’s a great tool for summarising vast amounts of information, and it helped inform some of my decisions, for example on fan placement and component selection.
What’s Next?
Now that my system is up and running, I’ll be putting it to the test. I’ll be sharing more about my workflow, editing techniques, and projects soon.
One final thing. If I was asked what I enjoyed most about the build, I would have to say one of the best moments was peeling off the transparent protector on the glass panel. It was like removing the protector on your brand new mobile phone screen, but 10 times better!
Some Useful Resources
If you’re thinking about building your own PC, there are endless videos on YouTube with lots of combinations of components. Reddit was a great resource, as was the manufacturer’s websites. The list below is only a suggested starting point. If you have any questions about my PC or want to discuss building your own I’d be happy to help.
Christopher Flannigan’s YouTube videos on PC building are remarkably clear, and he has a relaxed, friendly way of explaining things – there’s no ‘crash bang wallop’ and flashy editing, just good informative advice. I learned a lot from him, and I’d recommend his channel very highly. I watched so many of his videos, I swear I developed an Irish accent as I went through my own build.
How to Build a PC: The Ultimate Beginner’s Guide – PC Mag’s excellent Beginner’s Guide is worth studying, and provides much more detail than I’ve provided in this post.
PCPartPicker.com is also a great resource, it allows you to upload a list of the components for different builds, and receive comments and feedback from other users. It’s also really useful for getting rough prices for your components, finding suppliers, and calculating the power requirements for your build.
Tom’s Hardware and AnandTech are two good resources for parts reviews, but there are many more.
Reddit is a great place for finding opinions and advice. I found it to be generally helpful, without too much of the toxic arsiness that infects so much social media. The link here is to a beginners PC builder page, but I found it useful searching the whole of Reddit.
ChatGPT is a valuable resource when used with a certain amount of knowledge about its limitations. It’s scarily accurate on providing advice on changing certain components in your build for example, and what the impact is on the rest of the system. I’m planning to do a post about AI at some point, as it’s a hot topic at the moment. It’s very relevant to photography, where it’s becoming increasingly difficult to believe what we’re actually seeing hasn’t been artificially generated.